
Making a simple circuit with conductive paint, a battery, and an LED.
Materials and Tools
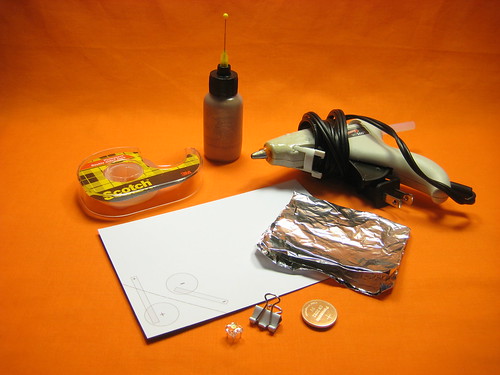
Basics:
– cu-pro cote copper water based conductive paint (more paints)
– squeeze bottle for copper conductive paint – Henna Applicator Bottles
– nozzle for squeeze bottle (we like 20 gage)
– plastic syringe
– pencil for sketching
– mixing stick
– postcard
– scissors
– aluminum foil
– tiny binder clip
– double-sided sticky tape
– hot glue gun
Electrical Components:
– surface mount LED
– 3V coin cell battery
Facts
Paint is good for about a day (maximum one week) after you put it into the plastic applicator bottles. You can use a beading needle to clean out the syringe tip, but this is a losing battle if the paint is old.
Steps
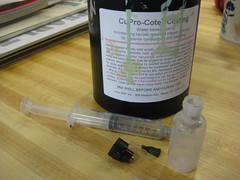
Preparing conductive paint for painting
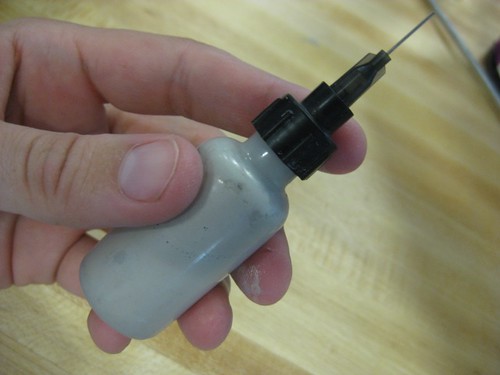
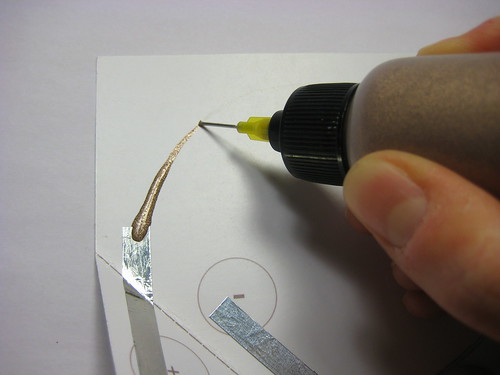
We have found it convenient to apply the copper conductive paint from squeeze bottles with very small nozzles. This allows us to paint very thin traces that can lead right up to the legs of the surface mount and through-hole components. It also gives the trace extra volume, thus better conductivity – which would otherwise have to be achieved by painting multiple layers of trace with a paintbrush.
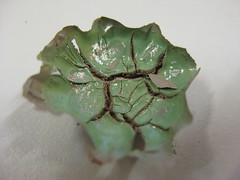
The paint oxidizes relatively quickly (within a day). When copper oxidizes it turns green.
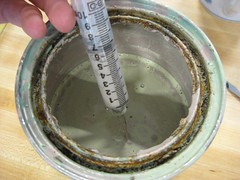
It is important to make sure the paint you are working with is kept fresh. Keep the paint sealed as airtight as possible. One trick is to add water to the paint in the pot when you know you will not be using it for a day or more. This will create an air-tight layer over the surface of the paint. Be sure to pour this water away before you use the paint again.
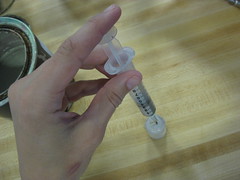
Stir paint in the pot using a clean stick until its consistency is even. Use a syringe to transfer paint from the pot to a squeeze bottle. Depending on the size of traces you want, choose a nozzle of the appropriate size.
While painting use a needle or a stripped magnet wire to cork the nozzle when not in use. This will keep the nozzle from clogging.
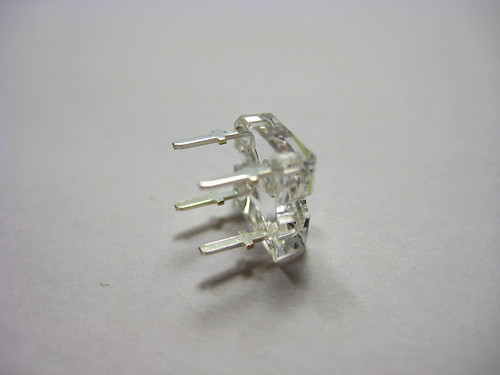
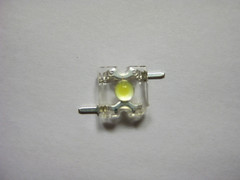
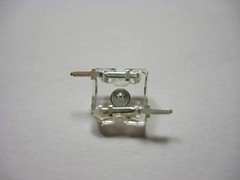
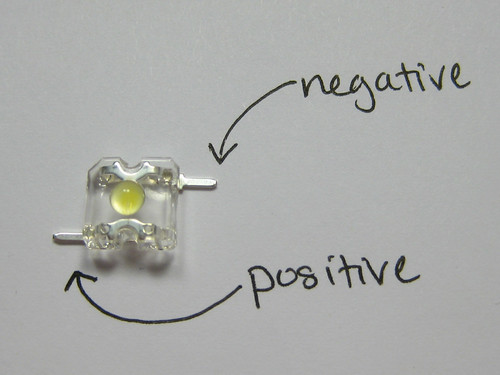
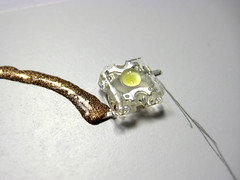
Prepare your LED
On your LED, bend one diagonally paired set of legs underneath and the other outwards. Your LED should lie flat when you’re done.
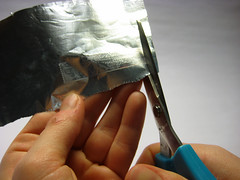
Prepare your postcard
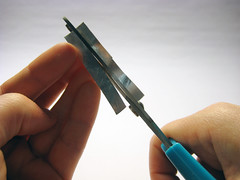
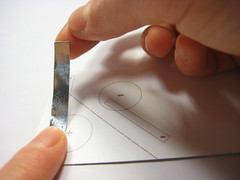
Stick a 1.5″ long piece of double sided sticky tape to a piece of aluminum foil. (You can also use copper tape or conductive fabric tape for this step.) Use scissors to cut around the tape so that you have a sticky-backed strip of foil. Then cut that strip intro two thinner strips.
Apply each strip of aluminum foil to your postcard where indicated by the template. (Or, you can just use your own design and estimate the placement to match our template.)
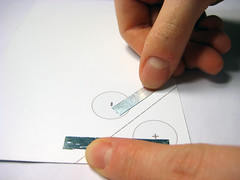
After you’ve applied both pieces of aluminum foil, your postcard should look something like this:
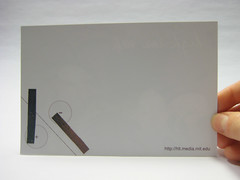
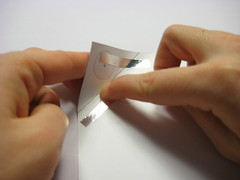
Finally, crease the corner of your postcard along the dotted line.
Design your circuit
Check to see which side of your LED is positive and which is negative.
As you sketch your design, make sure that you can paint a line from the foil that goes over the fold (coming out from the “+” circle) to the positive leg of your LED. This line can’t cross the second line that you’ll need to draw, which should connect the negative side of your LED to the un-creased piece of foil (coming out from the “-” circle) on your postcard.
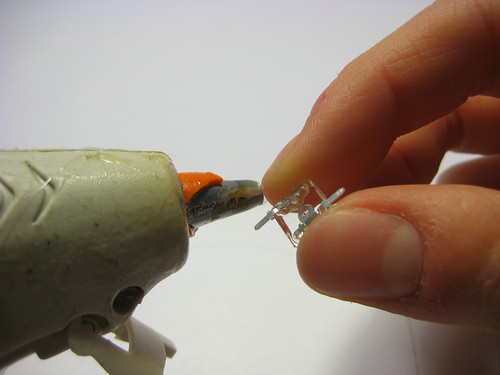
Once you’re satisfied with your sketch, glue down your LED. Put a small dab of hot glue on the backside and quickly press it onto your postcard, paying attention to which leg is positive and which is negative.
Paint your conductive traces
You will find it useful to have an extra sheet of practice paper lying around while you paint your circuit. Every time you begin drawing traces you will want to first draw a short trace on this scrap paper because often times the first amount of paint to come out will burst out and splatter, have bubbles or not come out at all. Start off drawing drawing practice traces and get used to regulating the amount of paint that comes out of the nozzle while you draw.
Here are some examples of poorly painted traces:

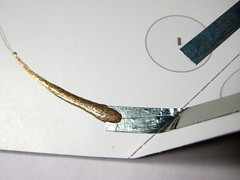
On the other hand, here is an nice example of a trace that will conduct electricity well:
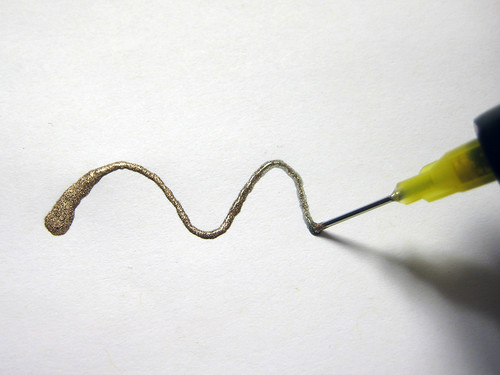
Once you’re ready, begin painting from the edge of the foil and following the lines in your sketch.
To ensure good connections between the paint and the foil/LED, paint right over them.
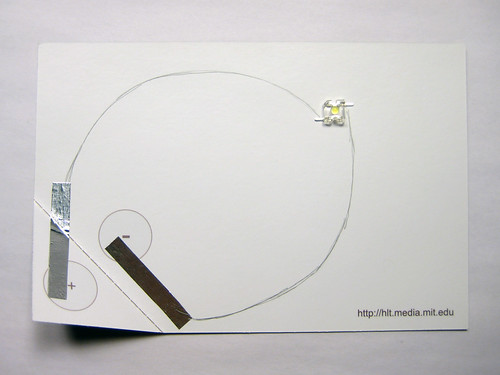
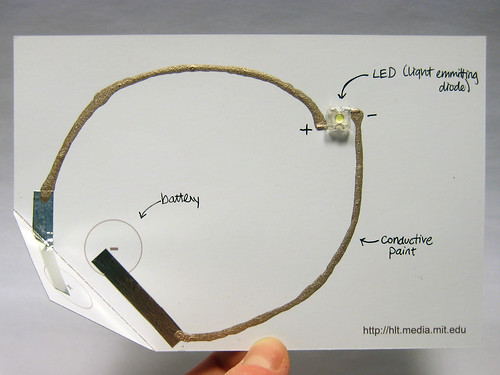
After you’ve painted your connections, your postcard might look something like this…
Wait for the paint to dry
The copper paint will not turn conductive until it has tried. As it dries, it will slowly become more conductive (it’s resistance decreases). For a single trace painted with the 22 gauge nozzle it takes about five minutes to dry enough to conduct for our purposes.
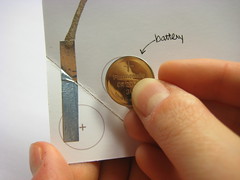
Add the battery
Once the paint has dried completely, place the battery on your postcard, according to the template. The side with a “+” sign should be facing upwards. Fold over the corner of the postcard so that each side of the battery is making contact with one of the foil strips.
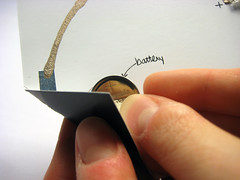
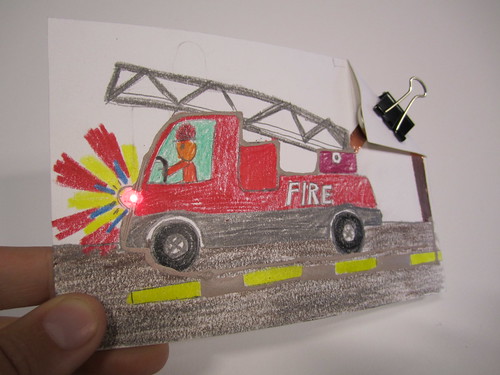
When you fold over the corner of the postcard, your light should come on!
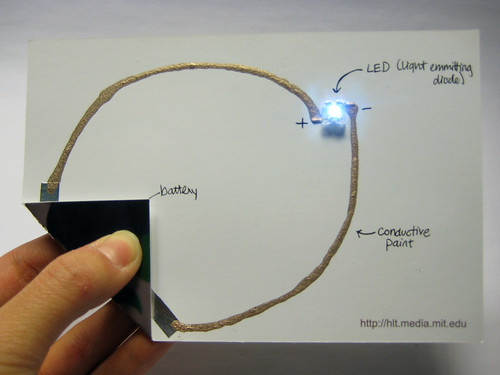
If your light isn’t working, try flipping the battery – you may just have reversed the positioning of your LED. If the light still isn’t working, inspect your conductive paint traces to make sure that they are continuous and also making adequate contact with the aluminum foil strips and legs of the LED.
