
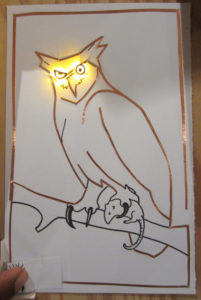
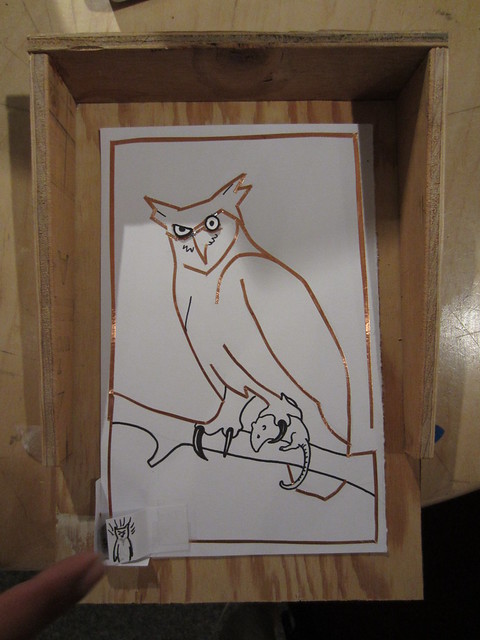
You can quickly create circuits on paper using copper tape, clear tape, and some simple electronics. The image above is from a workshop Jie taught at the Exploratorium museum, showing how you can combine the functional and decorative elements of a circuit.
Components (available from Digi-Key):
- CR1220 coin-cell battery (3V)
- white surface mount LED OR an alternative, easier-to-tape, LED
- copper Tape (1/4″)
Other tools & materials:
- small binder clips
- clear tape
- card stock paper
- scissors or an xacto knife and cutting mat
- tweezers
- soldering iron + solder (optional)
Getting started
You can use the templates we’ve created to guide your initial explorations. Here are two simple starter templates (click to view full size):

Electrical connections
Electrical connections between the LEDs, switches, and battery are made with copper tape (shown in grey in the templates). The first step is to lay copper tape over these grey areas.
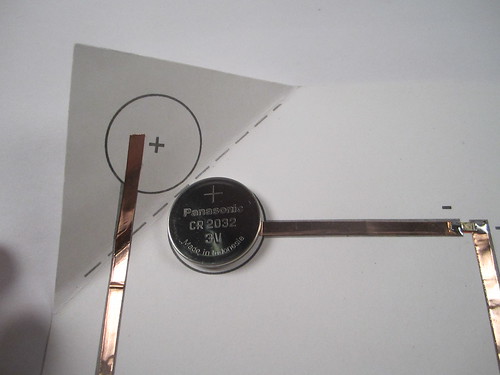
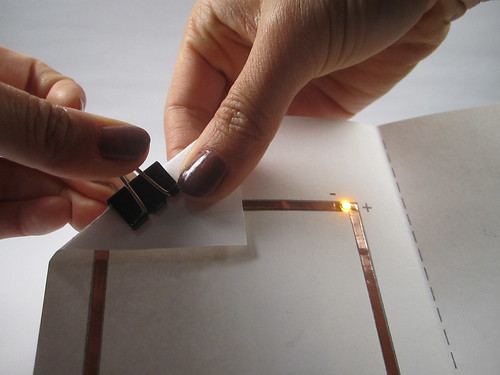
Battery connection
To secure the battery and create electrical connections between it and the copper tape, fold a corner of the page over and clip it around the battery using a binder clip or a paper clip:
LED connection
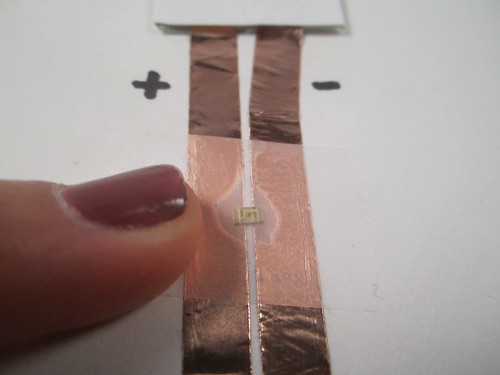
Surface mount LEDs, shown as yellow rectangles on the templates, are teeny tiny and can be challenging to work with at first, but aren’t bad once you get the hang of it. You’ll want a pair of tweezers and, depending on your eyesight, a magnifying glass. Alternatively, you can use the easier-to-tape variety recommended above.
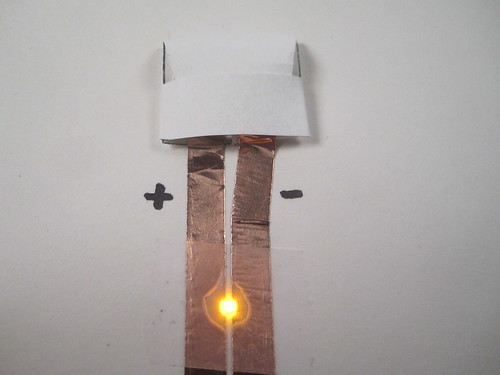
Before you attach your LED to your circuit you need to determine which side is the + side and which is the – side. The + side needs to be attached to the + side of the battery and the – side needs to be attached to the – side of the battery for the LED to turn on. If you’re using the easier-to-tape LED, the – side is marked with a silver line on the bottom of the LED. The – side of surface mount LEDs is often marked with a dot, a line, an arrow, or green coloring:

The LEDs can be taped or soldered to your copper tape. Taping is easier; soldering provides a more robust connection. Attach the LED so that the + side sits on the copper tape leading from the + side of the battery and the – side sits on the copper tape leading from the – side of the battery:
Putting it all together
That’s about all there is too it!
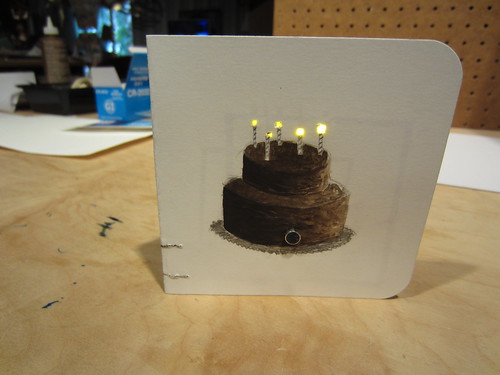
Now, move away from the templates and experiment with making shapes out of your copper tape traces:
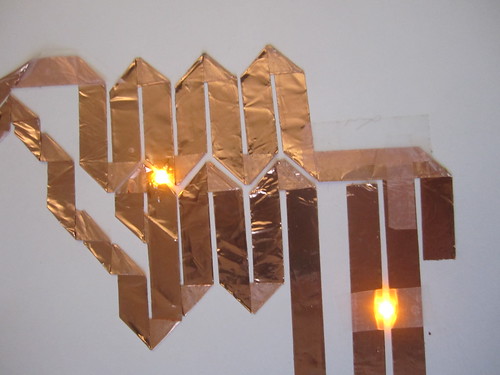
decorating your lights:
& building switches!
Additional templates
Here are a few additional templates with ideas for making your circuits more interactive. On each template, dotted lines indicate places where you should fold the paper and green lines indicate where you should cut the paper. You should also cut out and fold additional shapes (sliders, switches, and tabs) that are on the lower half of each template page. Click on a template to download a full-sized template.
You can also download a getting started pdf with detailed instructions for a few different circuits here.
Push Button Template: the light flickers as you slide your finger across the push button switch.

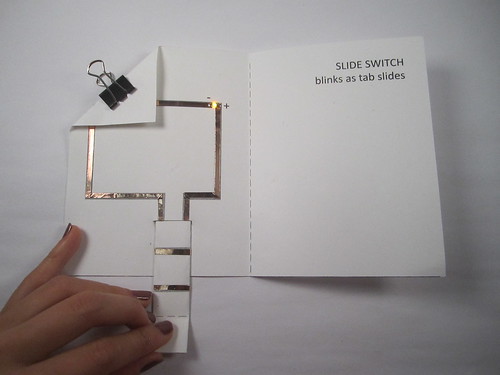
Slider Template: the light flickers as you slide the tab in and out.

Switch Open Template: the light glows when you open the page.

Links & inspiration
Jie’s workshop at the Exploratorium museum part 1
Jie’s workshop at the Exploratorium museum part 2
Jie’s website: additional workshop documentation
A gallery of light-up Diwali cards created by workshop participants at the Center for Education Research Training and Development in the Srishti School of Art Design and Technology.