
This tutorial explains how to do simple playback of short (~4 second), low-bitrate (8 KHz) audio samples from Arduino using only a speaker. It’s based on the PCMAudio code by Michael Smith.
Pre-Requisites
You’ll need:
- An Arduino Uno or Duemilanove
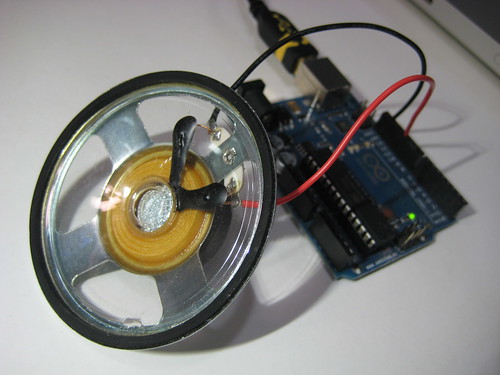
- A speaker with wires soldered to it. (Note that a piezo probably won’t work.)
- The Arduino software, version 0022, 0023 or 1.0
Explanation
The audio playback works using two of the Arduino board’s timers, hardware functionality of the AVR (ATmega328) microcontroller that’s normally used to generate PWM output with the analogWrite() function. One timer is used to generate a high-frequency square wave whose duty cycle corresponds to a particular value (amplitude) in the audio sample. Another timer is used to update this duty cycle at 8 KHz, the sample rate of the audio. As a result of using these timers, PWM output (analogWrite()) won’t work on pins 3, 9, 10, or 11. You should still be able to use pins 3, 9, and 10 for digital input and output. The audio signal will be generated on pin 11.
Download and Install the PCM Library for Arduino
Download: damellis-PCM-something.zip
Install:
- Unzip the file.
- Rename the resulting folder from “damellis-PCM-something” to simply PCM.
- If it doesn’t already exist, create a folder called “libraries” inside your Arduino sketchbook folder. (You can find the location of your sketchbook folder in the Arduino preferences dialog box.)
- Move the PCM folder into the “libraries” folder in your Arduino sketchbook folder.
Upload the Example
Launch the Arduino software. From File > Examples > PCM, open the playback example. Connect a speaker between pin 11 of the Arduino board and ground. Upload the example to your Arduino board. You should hear “Arduino Duemilanove” (pronounced by a real Italian!).

Library Functions
The library only has two functions: startPlayback() and stopPlayback(). The first takes two arguments: the array of audio samples and its length. For example: startPlayback(sample, sizeof(sample));
The stopPlayback() function doesn’t take any arguments and will stop playback of the current sample.
Note that the example also uses a couple of unusual Arduino constructions. First, the sample[] array is declared using the keyword PROGMEM, which causes the data to be stored in the Arduino’s program memory (Flash) instead of its RAM (which is much smaller). It also uses the sizeof() function, which returns the number of bytes used by an array.
Encode Your Own Audio Sample
To encode your own audio samples, you’ll first need to down-sample the audio to 8 KHz, 8-bit mono sound, then convert it to a series of numbers that can be pasted into your Arduino program. Note that you’re only going to be able to store approximately 4 seconds of audio on the Arduino, so you might want to trim your clip first (e.g. using Quicktime).
One easy way to down-sample the audio is with iTunes. First, Import your original sample into iTunes. Then open the preferences dialog and, on the general tab, click “Import Settings…”. From there, select “Custom” from the “Setting” drop-down. Inside the custom settings, select “Stereo Bit Rate” of 16 KHz, a “Sample Rate” of 8 KHz, and Mono “Channels”. Hit Okay in the various dialogs. Remember to change these settings back when you’re done, or any audio you rip from a CD will sound terrible!

Now you can right-click on your audio file in the iTunes list and select “Create MP3 version”. (This should work even if the original file is already an mp3.) You’ll end up with a new, 8 KHz, mp3 file. Listen to it to get an idea of the audio quality you can expect when playing the sample from the Arduino board.
To convert the down-sampled audio file to numeric values you can paste into your Arduino program, you can use the EncodeAudio application. This is a simple Processing program (source code on GitHub) that reads an audio file and copies its audio data to the clipboard in numeric form.
Download:
- Windows: EncodeAudio-windows.zip
- Mac OS X: EncodeAudio-macosx.zip
- Linux: EncodeAudio-linux.zip
Unzip and run the application. It should prompt you for an audio file to encode. Select the new mp3 file you created with iTunes (you can locate it by right-clicking it within iTunes and selecting “Show in Finder”). The EncodeAudio application will convert it to numeric values and then copy them to the clipboard. It may take a few seconds. A dialog will appear notifying you whether or not the encoding was successful.

Now, go into the playback example in Arduino and delete the current line of numbers in the sample array. Paste the new numbers copied to the clipboard by the EncodeAudio program. Then you should be able to upload your new program and hear your own audio file.
If you get a warning that your sketch is too big for the Arduino board, delete some of the numbers from the end of the sample array.