
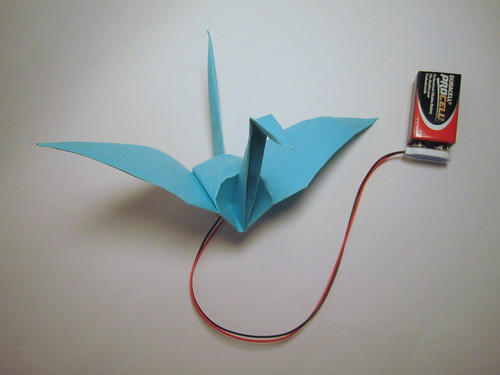
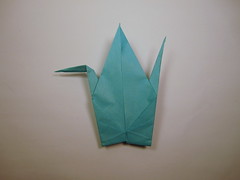
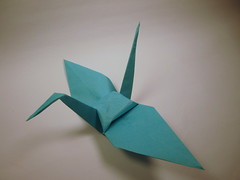
Use shape memory alloy to make an origami crane that gently flaps its wings when you squeeze its tail.
Materials and Tools
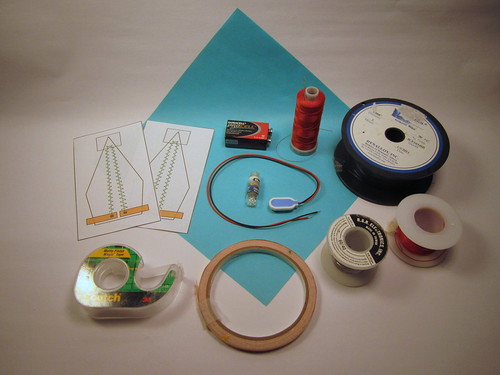
Materials:
– origami wing pattern (download here)
– 1 sheet 9″ x 9″ origami paper square (out of thin paper)
– 40 cm (16″) 0.006″ HT Flexinol wire a type of nitinol wire that contracts when heated.
For more information on using Flexinol, visit here
– 2 x crimp beads
– 1 x 9V battery
– 1 x 9V snap battery holder
– 15 cm (6″) of 1/4″ copper foil tape
– thin wire (such as 29 AWG 392° F High-Flex Miniature Wire)
– sewing thread
– scotch tape
– solder
Tools:
– scissors
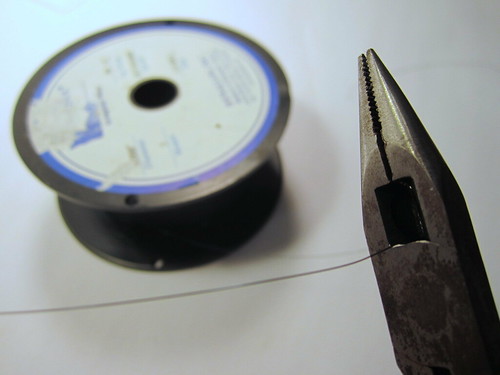
– wire strippers or pliers
– soldering iron
– needle
Instructions
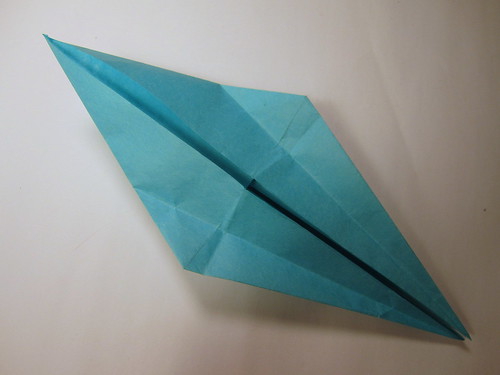
Step 1: Fold an origami crane
There are step-by-step directions on how to fold an origami crane here and a good video tutorial here


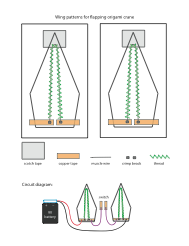
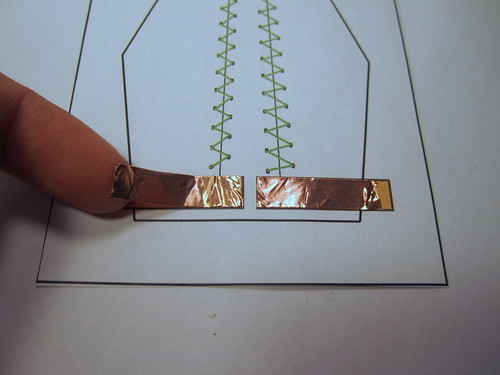
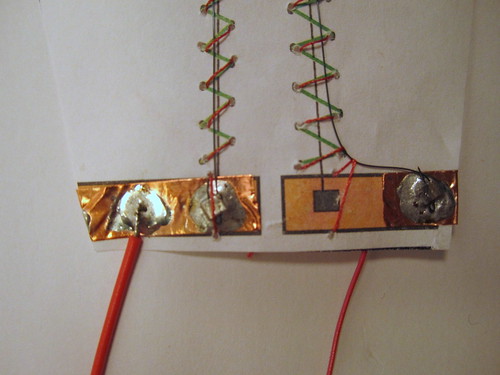
Step 2: Cut out wing insert patterns along the dotted rectangle and stick approximately 2.5 cm (1″) copper tape onto the pattern
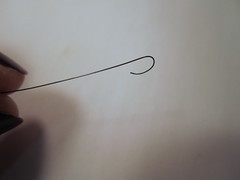
Step 3: Cut the nitinol wire into two pieces, 20 cm (approximately 8″) in length
Step 4: Attach crimp beads to the end of the nitinol wire
Since we cannot solder directly to the nitinol, we must use solderable crimp beads. Fold the end of the nitinol wire into a “u” using the pliers and the slip the crimp bead over. Flatten the bead using the pliers so that it firmly clings to the end of the nitinol.
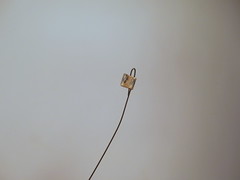
Step 5: Tape the nitinol wire with crimp beads onto the pattern
Fold the nitinol wire in half and tape down the bend so that it matches the pattern.
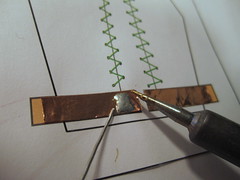
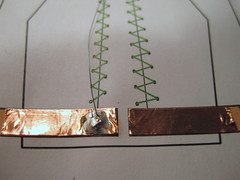
Step 6: Solder the crimp beads to the copper tape, matching the pattern
A trick is to first place a mound of solder onto the copper tape and place another mound of solder onto the crimp bead. Then bring the two together and heat them until two mounds of solder melt and flow together. It’s okay if the soldering iron touches the nitinol during this process, the goal is to make sure the crimp bead is firmly soldered to the copper tape.
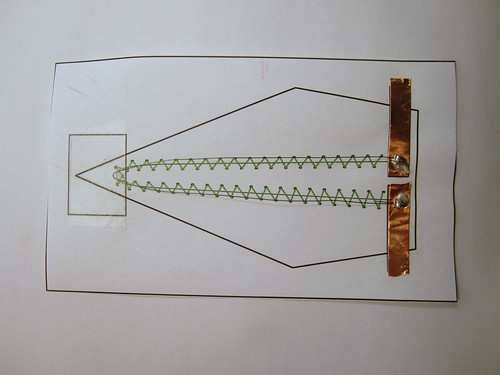
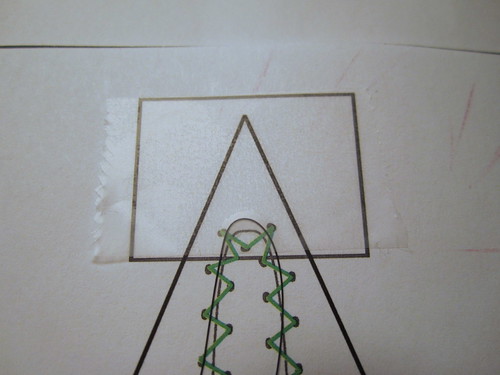
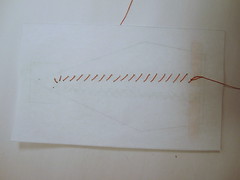
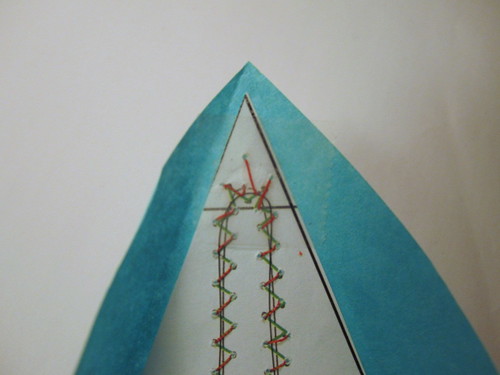
Step 7: Sew the nitinol wire to the paper
Using the needle and sewing thread, sew the wire to the paper following the zigzag on the pattern. Make sure not to sew through the copper tape when securing the end. One way to secure the thread to the paper is to sew a loop around the copper tape and tie off the end.
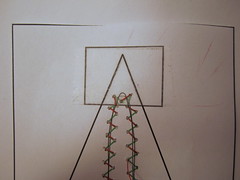
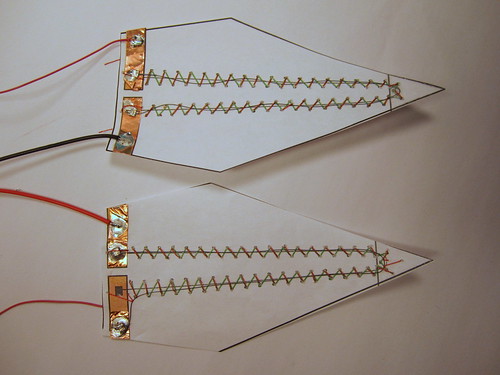
Step 8: Cut the wings out of the pattern
Be careful not to cut through the stitches.
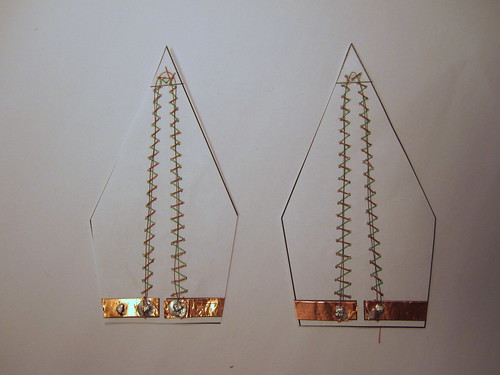
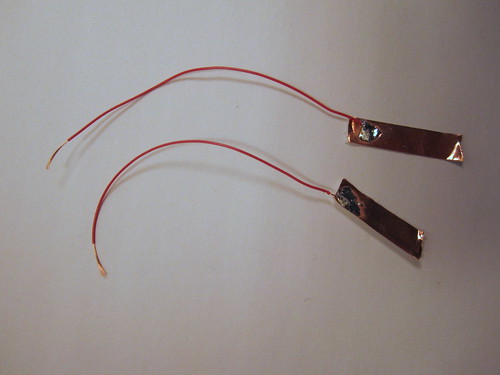
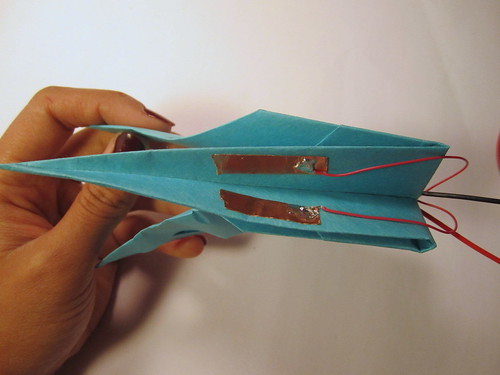
Step 9: Solder one end of the battery holder onto each wing
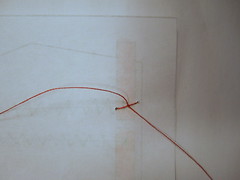
Step 10: Cut two pieces of thin wire, about 10 cm (4″) in length and solder a small piece of copper tape onto each wire
These will be used later to make the switch
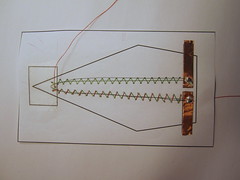
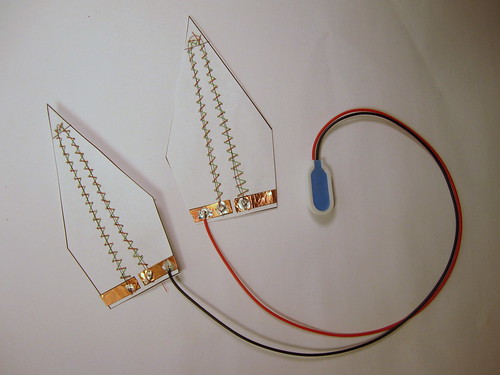
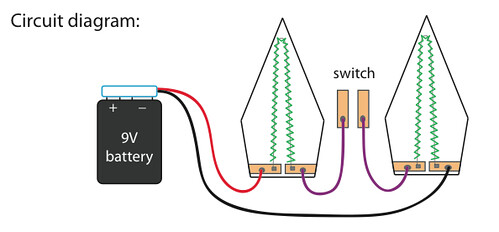
Step 11: Solder one thin wire with copper tape onto each wing, following the circuit diagram on the wing pattern
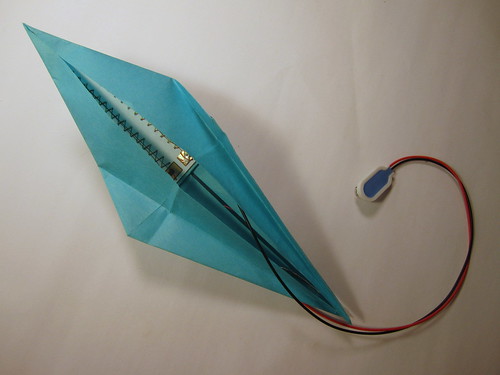
Step 12: Preheat the nitinol wire
Spread out the pieces so that the copper tapes on the wings do not touch and then connect a 9V battery to the battery holder. Touch the two dangling copper pieces together, to complete the circuit. As the current flows through the nitinol the wire will heat up and contract, which causes the wings to curl up slightly. Let the wire heat up for about 5 seconds, or until the wings stop curling. If you let the wire heat up for too long, it will burn out and stop contracting. When done preheating, make sure to take out the 9V battery.

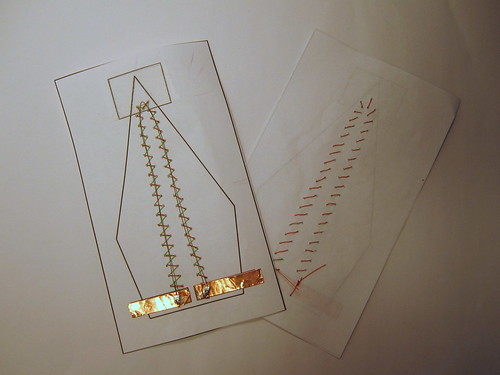
When the wire cools down, you will notice that the nitinol will have gotten slightly longer and started to become wavy within the stitches:

Step 13: Tension the nitinol wire
In order to make the curling more dramatic, you will need to tension the nitinol wire. Lift up the copper tape on one end of the wing, pull it outward so that the nitinol is straight again in the stitches and stick the copper tape back down.
In the image below, the bottom wing has been tensioned while the upper wing has only been preheated:
Step 14: Assemble the wings
Unfold the origami crane so that you can open the wing
Place a loop of tape on the back of the wing insert (the side without nitinol wire) towards the bottom. Then place this into the wing of the origami crane, nitinol wire facing out.

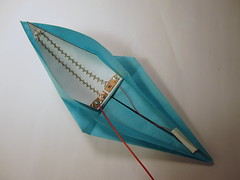
Tape the top of the wing insert onto the origami crane.
Step 15: Refold the origami crane
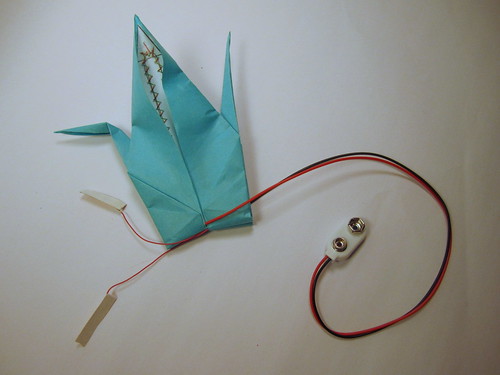
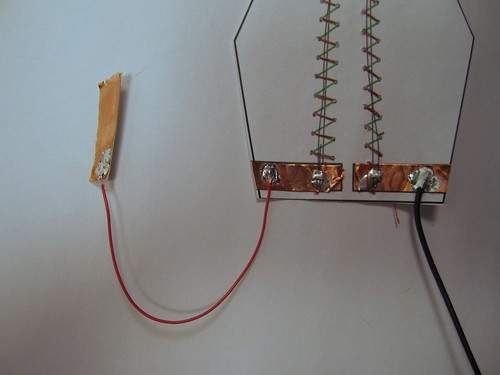
Step 16: Construct the switch by taping one copper strip to each side of the tail
The two copper strips touch when you squeeze the tail (closing the switch) and separate when you let go (opening the switch).
The crane is complete! Just add the 9V battery.
To help the wings flap more dramatically, pre-curl the wings. When you squeeze the tail, the nitinol will heat up and the wings will curl down. When you let go, the wings will rise back up as the nitinol cools. Make sure to let go of the tail when the wings reach their maximum curl. Also, I’ve learned from experience that 9V batteries are often overcharged so that when they’re new, the voltage is higher than 9V. So if you’re running the crane on a fresh battery, be especially careful not the activate the wings too long… or they’ll burn out and you’ll need to replace them!